I think needle books are so handy, I try to spread the love and make one for everyone I know. In the past, I kept it simple with a few rectangular pieces of felt stacked, folded down the center, and hand-stitched to form a binding.
I recently saw a fun round needle book and had to give it a shot for a few Christmas gifts.
I added snaps to the pages so you can take the book apart if desired and just carry one page. I also added a snapping ribbon closure to keep everything contained.
Since I can't make needle books for all of you, I'll share a tutorial so you can make your own.
Materials:
3 colors of felt
embroidery floss
thread
3 sets of sew-on snaps
ribbon
embellishments
Tools:
scissors
something round to use as a pattern
sewing marker
embroidery needle
straight needle
match or lighter to heat-seal ribbon
Step 1: Cut out your pieces.
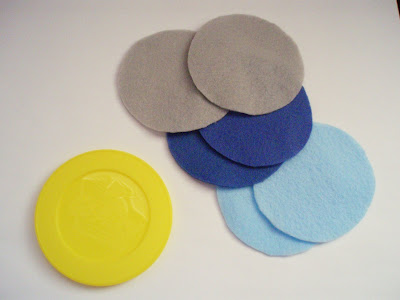
Trace around the circle pattern (I used a snack cup lid) and cut out two circles from each color of felt.
Step 2: Cut out a half circle. Blanket stitch straight edge.
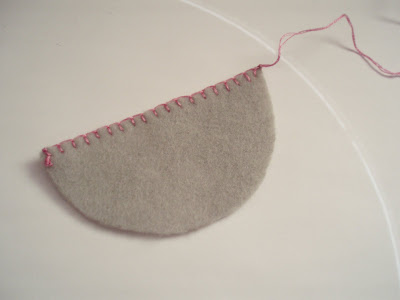
I traced the lid again and eyeballed the halfway point on it. Use 3 strands of embroidery floss to blanket stitch across the straight edge of the half circle. Leave a long tail of floss at the end.
Step 3: Attach a snap to the half circle.
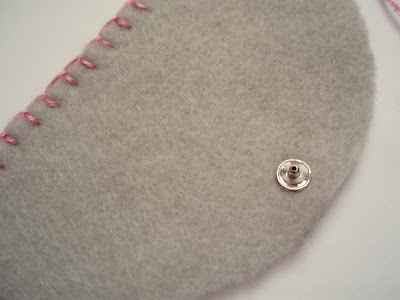
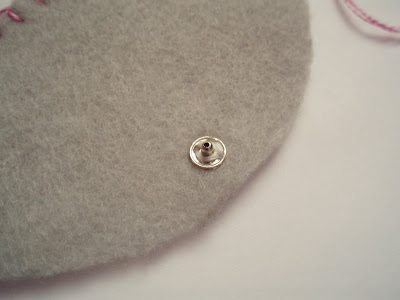
Use thread to sew one half of a snap onto the half circle, near the center edge of the round side. (If you're lucky enough to own a snap press, you could use that instead for all the snaps in this book.)
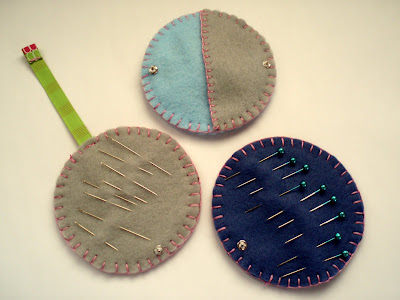
Step 4: Attach snaps to book "pages."
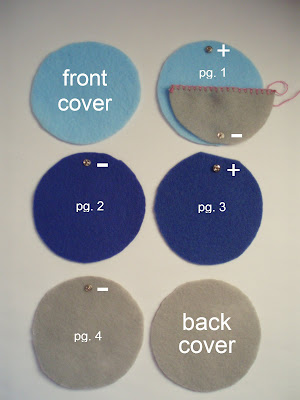
Lay out your circles as shown and sew snaps on with thread. I've labeled the snaps in the picture for you. Use the female side of your snap where the + is and the male side where the - is (or vice versa, it doesn't matter which way). Make sure the snaps are all sewn the same distance from the edge.
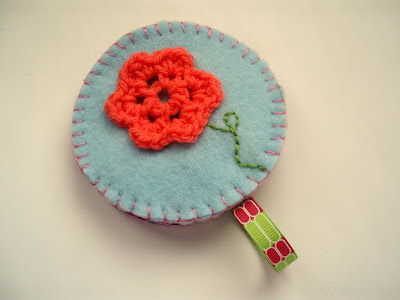
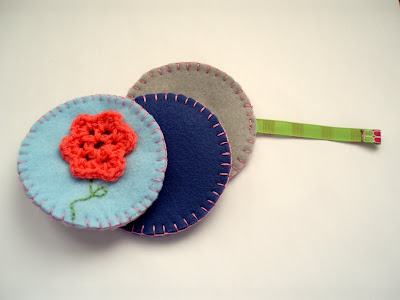
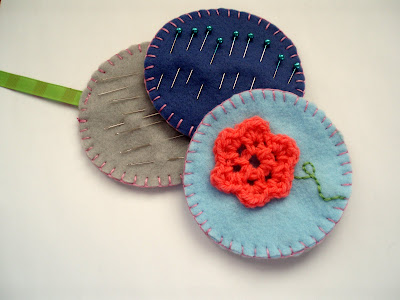
Step 5: Decorate front cover.


You can do whatever you want. I attached a crocheted flower and embroidered a stem/leaf here, but in the past I've embroidered names and words and initials, appliqued pictures, embroidered designs, sewn on buttons, etc.
Step 6: Prepare ribbon closure.
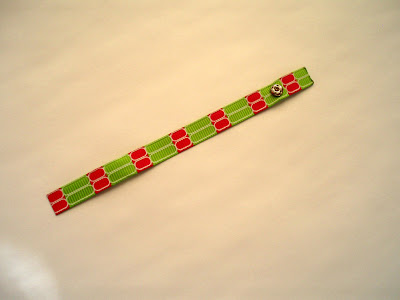
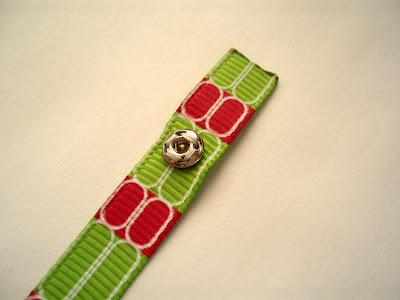
Heat-seal ribbon ends with a match or lighter. Just hold the ends next to the flame until they melt. This keeps the ribbon from fraying. Attach your final snap half to ribbon, about 1" from the end. (This will be the opposite snap to the one you attached to the half circle of felt.)
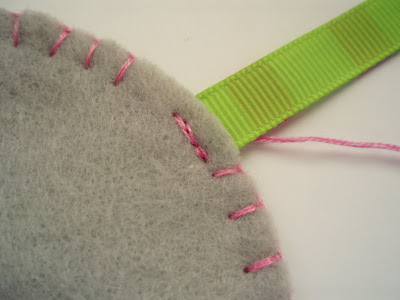
Step 7: Blanket stitch back cover to page 4, leaving a gap to attach the ribbon.
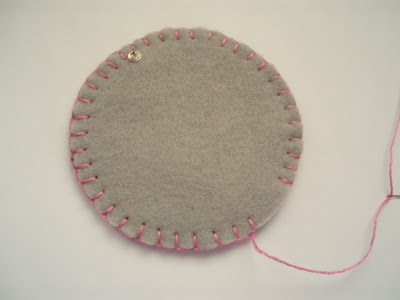
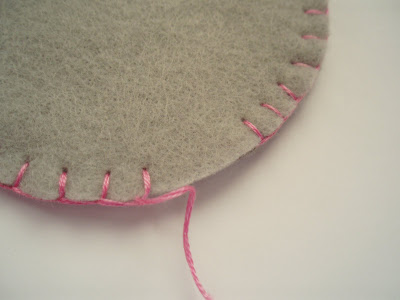
Use three strands of embroidery floss to blanket stitch the two pages wrong sides together. Leave a long tail of embroidery floss.
Step 8: Attach ribbon to page.
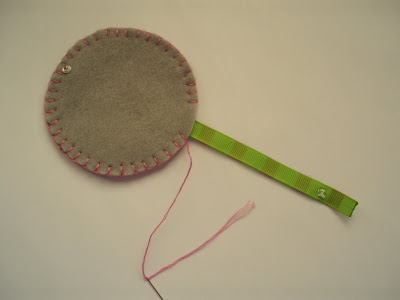

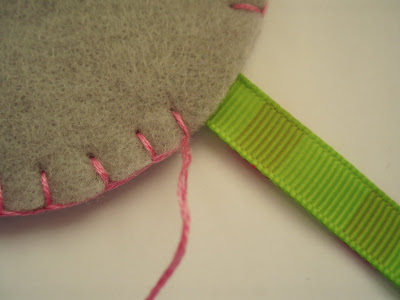
Slide ribbon between back cover and page 4, into the gap you left in your blanket stitching. Make sure the snap is left out and the right side of the ribbon is facing the back cover.
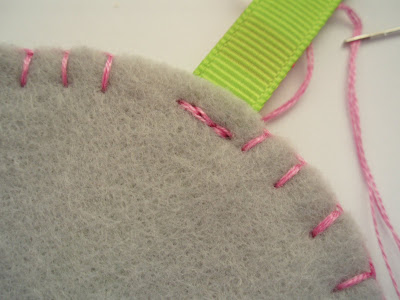
Stitch ribbon in place using embroidery floss tail.
Step 9: Finish end of ribbon.
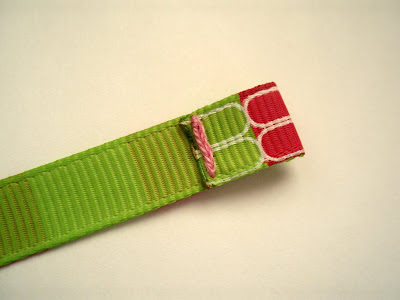
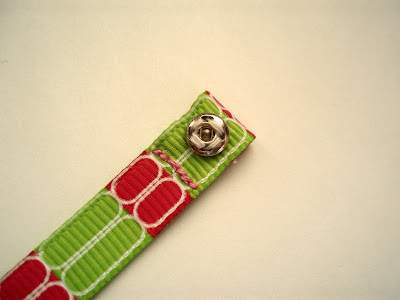
Fold over raw edge of ribbon to hide where you stitched the snap on. Stitch down with 3 strands of embroidery floss.
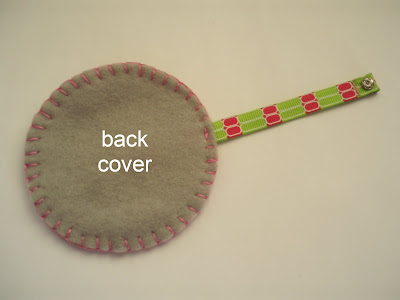
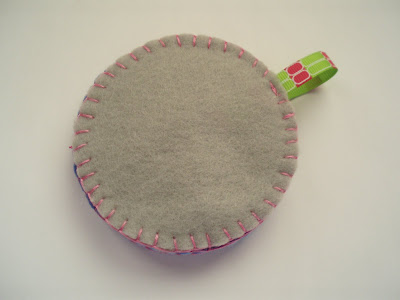
You should now have this:
 Step 10: Blanket stitch half circle to page 1 and page 1 to front cover.
Argh, I don't have a picture of this. Just stack the pieces together: back of half circle to front of page 1 (lining up round edges), and back of page 1 to back of front cover. Use the tail you left on the half circle to blanket stitch around all the edges.
Step 11: Blanket stitch page 2 to page 3.
Stack the pages wrong sides together, making sure the snaps are back to back, and blanket stitch around edges with 3 strands of embroidery floss.
Step 12: Snap it all together and you're done!
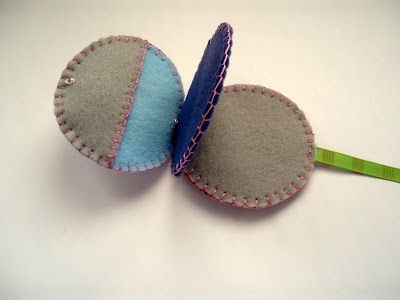
The top snaps join the pages together, and the snaps on the half circle and the ribbon close the book.

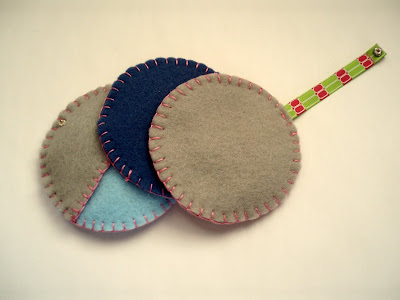
Load it up with some pins and needles, and it's a handy portable needle book. The half circle forms a pocket in which you can store loose threads, needle threaders, and other small tools.


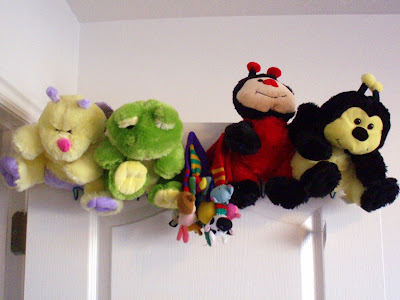
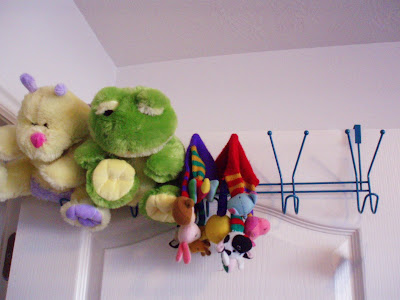
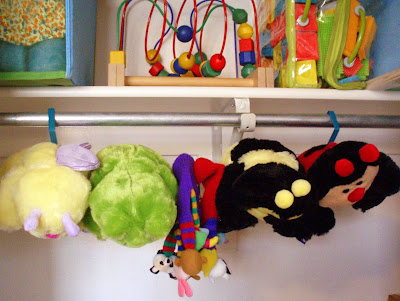
 I've been looking for something on/in which to store the hand puppets Margaret got for Christmas. I saw a tip online to use a plate rack to hang them on, but I was having trouble finding one that would work well and for the right price.